We're all ready for Halloween--hooray! The bags of candy are hiding in the guest bedroom, where I am (unsuccessfully) trying not to steal from them:
Candy Corn and Reese's Peanut Butter Cups are my weaknesses. The autumn-leaves garlands are up in their customary place above the front porch:
A well-beloved craft made by pudgy hands long ago hangs on the front door:
The witchy black cat lurks nearby in the window:
And the pumpkins sit on the front porch in urns, waiting to be carved into Jack-o-Lanterns:
But if I don't get around to all the cutting, gutting, and carving, I don't have to sweat.
I have the Jack-o-Lantern thing covered. My secret is a crafty idea I'm happy to share with you.
This idea popped into my head one year when my kids were little. In those days I made all their costumes--and matching treat bags--from scratch. After several weeks of inventing and executing three custom-made costumes, I had little time or energy left to carve pumpkins. And so I invented...
Fishbowl Jack-o-Lanterns!
Time to make: half an hour or so (a little more if you have a preschooler "helping")
Time to dry: an hour or so, depending on your weather.
Materials:
one cheap glass fishbowl (from your local crafts store or florist)
orange tissue paper (a sheet or two should do it)
black construction paper (half an 8"x11" sheet is plenty)
liquid starch (find it on the laundry-products aisle of your supermarket)
scissors
cheap crafts brush, with the bristle part about 1/2 inch to 1 inch wide
small glass or china dish (to hold liquid starch)
newspaper, towel, or old tablecloth (to catch any drips)
Instructions:
1. Cover your work area with newspaper and assemble all your materials (my granite counter top isn't fazed by liquid starch, so I don't bother putting anything down):
2. Cut up tissue paper into a pile of squares or rectangles roughly an inch or two per side. (Don't worry about the exact shape or size; irregularities work just fine for this project.)
3. Pour a few tablespoons of liquid starch into a dish.
4. Turn the fishbowl upside down and paint a small section of the bowl with liquid starch. Apply a square of tissue to the painted surface, then paint more starch over the tissue to fully adhere it to the bowl. Continue applying the tissue a piece at a time, in a slight overlap, so no clear-glass gaps show:
5. When you get to the "equator" of the bowl, flip it right side up (the bottom, oldest squares should be tacky-to-nearly-dry by this time), and continue applying tissue right up and over the rim of the bowl. Paint the inside lip of the bowl with starch and fold the topmost squares up and over the bowl, sealing with more starch.
6. Use the black construction paper to trace and cut out the Jack-o-Lantern's facial features (or go freehand, if you have the artistic skeelz). You want at least eyes and mouth, but you can add nose, eyebrows, worry lines, scars, or whatever else you want. Paint the back of each piece with starch, stick on the fishbowl, and paint over the black paper with some more starch.
7. When starch is completely dry, put a votive candle (or a fake, battery-operated candle) inside the fishbowl, and set in a window or somewhere away from the flow of traffic. Add visual interest by varying the heights of the Jack-o-Lanterns using cake stands or inverted, clear-glass bowls:
Then, stand back and wait for the compliments to roll in!
Here's the night view of the "pumpkin":
When Halloween is over, store the Jack-o-Lanterns for next year. One might occasionally break (after all, we're talkin' cheap glass, here), but over the last 18 years or so I've only lost two Jack-o-Lanterns.
And they are so quick and easy to make over again, it's a snap to replace them.
You might even have time to carve some real pumpkins, as well.
So, Halloween is Sunday? Bring it!
Stories of food, tea, pugs, simple living in big cities, and all things cute.
Friday, October 29, 2010
Wednesday, October 27, 2010
Scary Cake-Pops, Just in Time for Halloween!
I haven't had a moment to myself these days, between thesis, classes, grad school apps, and homework. Whew! However, if I had did have time, I'd devote it to reading, cooking, and baking.
And, since Halloween is coming up, I'd bake these:
Images via These Peas are Hollow
How great are those? They're from the website These Peas are Hollow, which I found from a blog I visit from time to time called Foodgawker.
They're cake pops, which are sort of like the new cupcakes, I suppose, trendy and decorated and all. Also: adorable looking. And hopefully delicious. Recipe at the These Peas are Hollow link!
How great are those? They're from the website These Peas are Hollow, which I found from a blog I visit from time to time called Foodgawker.
Sunday, October 24, 2010
The Biggest in the World
One thing I've noticed about the city of Dubai: they really like having the biggest things. Not just really big and grand and impressive, no, but The Biggest in the Whole World. Call it gross excess and consumerism of the worst kind if you'd like (hi, Mom!), but you at least have to respect it as incredibly impressive. And often incredibly beautiful.
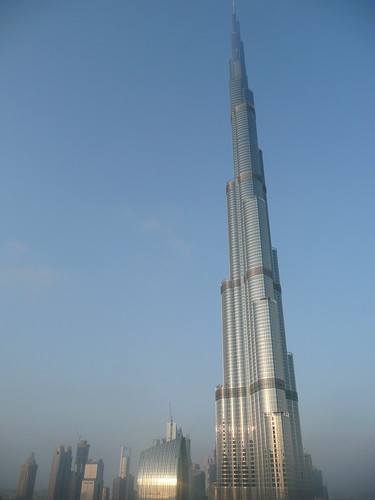
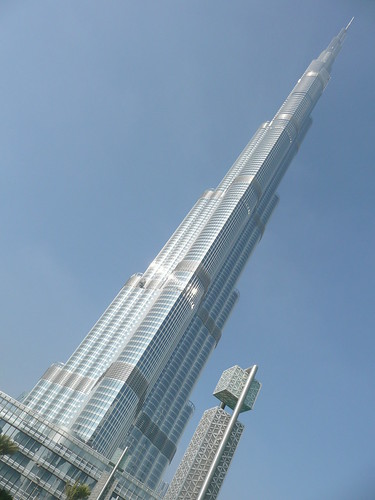
Here, as seen from my 22nd-story apartment, is the tallest building in the world, the Burj Khalifa. It is 2,717 feet tall. For comparison, the second-tallest building in the world is the CN tower in Toronto, at 1,815 feet tall. The Burj is 50% taller than the next tallest building in the world. It is more than twice as tall as the Empire State Building. That's crazy.
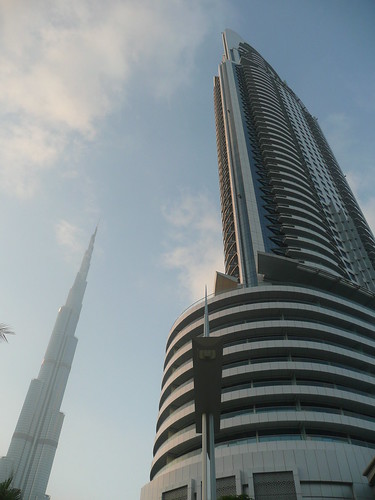
It's so inimaginably massive that from below (or even from 22 stories up), it just looks "really big." It's not until you compare it to "normal" skyscrapers that your brain can even begin to comprehend the scale of what you're seeing.
As if that weren't enough, the Burj Khalifa also holds the world records for fastest elevators, highest swimming pool, most floors, highest occupied floor, highest outdoor observation deck, highest-reaching elevator (they go up into the spire!), and highest mosque.
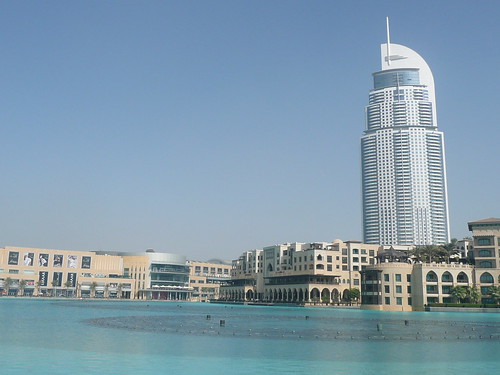
Also visible from my gorgeous 22nd-story view: the tallest hotel in the world.
It's called The Address. I don't know why, especially considering that bulidings/places in Dubai don't have addresses at all. Heck, most of the streets don't even have names. It's an odd choice to be sure.
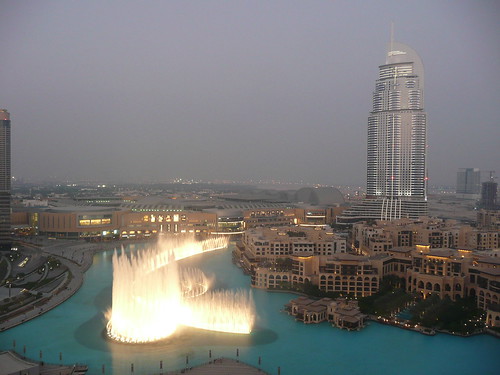
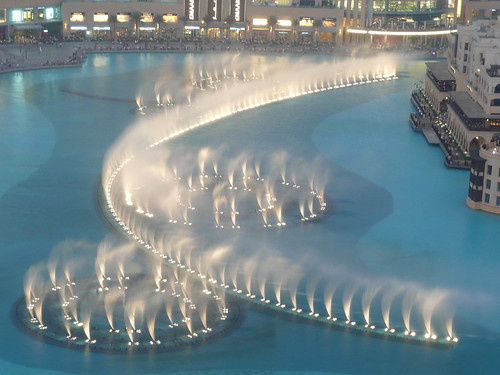
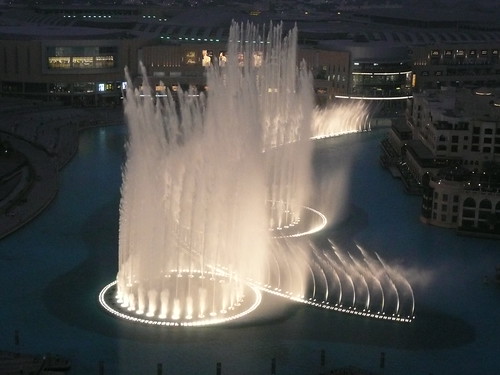
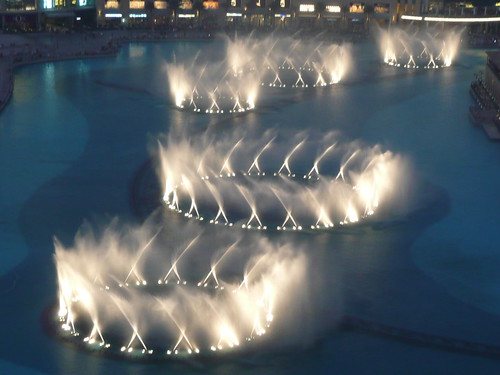
Between these two massive buildings is one of the most beautiful man-made things I have ever seen.
Technically, it is the world's largest fountain. But really, that doesn't mean much to me. What is really impressive is that it is gorgeous. Captivating. Absolutely entrancing. And it was made by a Stanford prof!
The big jets of water are shot out at supersonic speeds, so that even right overlooking it you see the water burst up far before you hear the boom. According to wikipedia, the fountain shoots water to 490 feet high, but from the vantage point of the 22nd floor, the water was still a bit under my level. Which is to say... maybe 15 stories? 18 stories? Damn impressive, whatever it was.
The water dances. It sways. It shoots like a missile. It is graceful, powerful, feminine, masculine. It curves and moves and punctuates itself. It is my favorite thing I have found in Dubai.
Behind the fountain is the Dubai Mall. You guessed it--the largest in the world at 1200 stores. Yes, you read that right. Twelve. Hundred. Stores. This is almost sickening to me, somehow. But inside you'll find one of my favorite "biggests" in Dubai: the world's largest acrylic panel, at 32.88 m wide × 8.3 m high × 750 mm thick and weighing 245,614 kg. Why is this so exciting? Because it's a damn cool aquarium!
Ten million liters! Thirty three thousand marine animals! Massive schools of fish! Multiple types of huge sharks! Free for public viewing!
Now this is the kind of gross excess that I can really get behind. :)
Friday, October 22, 2010
Tapas for Dinner
Way back in August, when our kitchen looked like this:
and we had no working stove and no counter tops, Lovely Daughter #2 and I got an itch to have tapas for dinner. We'd enjoyed them all over Barcelona when we spent a week together there, and we weren't going to let a little construction mess get in the way of our wishes!
"Tapas" means "lids" in Spanish, as in "lids atop big glass jars."
I'm not sure where I first learned this, but these yummy appetizers got their name because, in Spain and certain Latin American countries, bartenders used to whip up quick little bites for their customers, then place the concoctions on top of the big jars of pickled eggs and veggies that stood on the counter tops in these establishments.
So with absolutely no recipes, no counter tops, no stove, and no real plan, we dove right in! First, Lovely Daughter #2 buzzed up a terrific dried-tomato tapenade in the food processor (please note the propane cannister, which was fueling our camp stove at the time, since we had no other cooktop):
She laid out some thin slivers of Asiago cheese and drizzled a truffle-enhanced olive oil over them:
She spread some toasted baguette rounds with the tapenade mixture and topped them with a sliver of basil. Meanwhile, I plopped little squares of gorgonzola cheese atop other baguette rounds, and drizzled olive oil over them:
Then I created a mini-pastry cup by inverting a mini-muffin tin and baking circles of herbed pastry crust on the back of the tin. (The recipe for the herbed crust is below.) I filled the baked, cooled cups with fresh buffalo mozzarella and a dab of Major Grey's Chutney:
Happily, I had already made a batch of caramelized onions, so we put a blob of them on circles of raw zucchini and added a dab of roasted red peppers (straight out of a jar) for color:
We added a few nibbles we put together from stuff in the refrigerator, then laid everything out on a little bu1tffet table, using lifts and levels (like decorator Christopher Lowell taught me. Yay, Christopher!). From the back, you can see 1)mixed whole olives, 2)whole marinated artichoke hearts (on the white plate), 3)Asiago cheese drizzled with olive oil, 4)edamame (white bowl), 5)red bell-pepper strips with hummus, 6)tempeh strips, 7)herbed pastry cups with buffalo mozzarella, and 8)zucchini circles with caramelized onions:
Served up with a glass of white wine, we could almost imagine we were at one of the noisy, crowded, fun bars in Barcelona:
Oh! and we had strawberries with brown sugar for dessert:
Well, at least some of us had strawberries for dessert.
If you have an informal gathering coming up, or if you just want to do something a little different for dinner, try putting together a tapas buffet. It's easy, it's quick, and the only limit is how far your imagination can take you!
Herb Pastry
(recipe from the Los Angeles Times Magazine, July 25, 2004)
1-1/2 C. all-purpose flour
1 Tbsp. minced fresh rosemary
1 Tbps. minced fresh thyme leaves
1/2 tsp. salt
12 Tbsp. cold, unsalted butter, cut into 1/2-inch cubes
4-6 Tbsp. ice water
In the bowl of a food processor fitted with a metal blade, pulse the flour, rosemary, thyme, and salt until blended. Add the butter and pulse until the mixture resembles coarse cornmeal, with pieces no bigger than small peas, about 13 to 15 one-second pulses.
Add the mixture to a mixing bowl and drizzle with 4 Tbps. cold water. Thoroughly mix with a fork to form a "shaggy" dough. Squeeze some in your hand. If it doesn't hold together, add the remaining water one tablespoon at a time. Form into a disc, wrap in plastic and refrigerate at least 1 hour, or overnight if needed.
Position the oven rack in the lower third of the oven. Preheat the oven to 400 degrees. On a lightly floured surface, roll out the dough into a 13-inch circle.* Ease it into the tart pan, fitting it snugly against the sides and bottom, and trim the excess. Prick the bottom of the tart with a fork and cover with parchment paper or foil. Fill tart with pie weights or beans. Bake for 25 minutes. Remove weights and parchment or foil. Set aside tart shell to cool.
*[To make the tapas cups, I rolled out the dough to a roughly-13-inch circle, then cut out eight circles, each about 3 inches in diameter. I draped the circles over the back of mini muffin tins and pressed them gently into place. They took about 15 minutes to bake into rustic "cups," which I let cool a while on the muffin tin, then turned onto a wire rack to continue cooling.]